
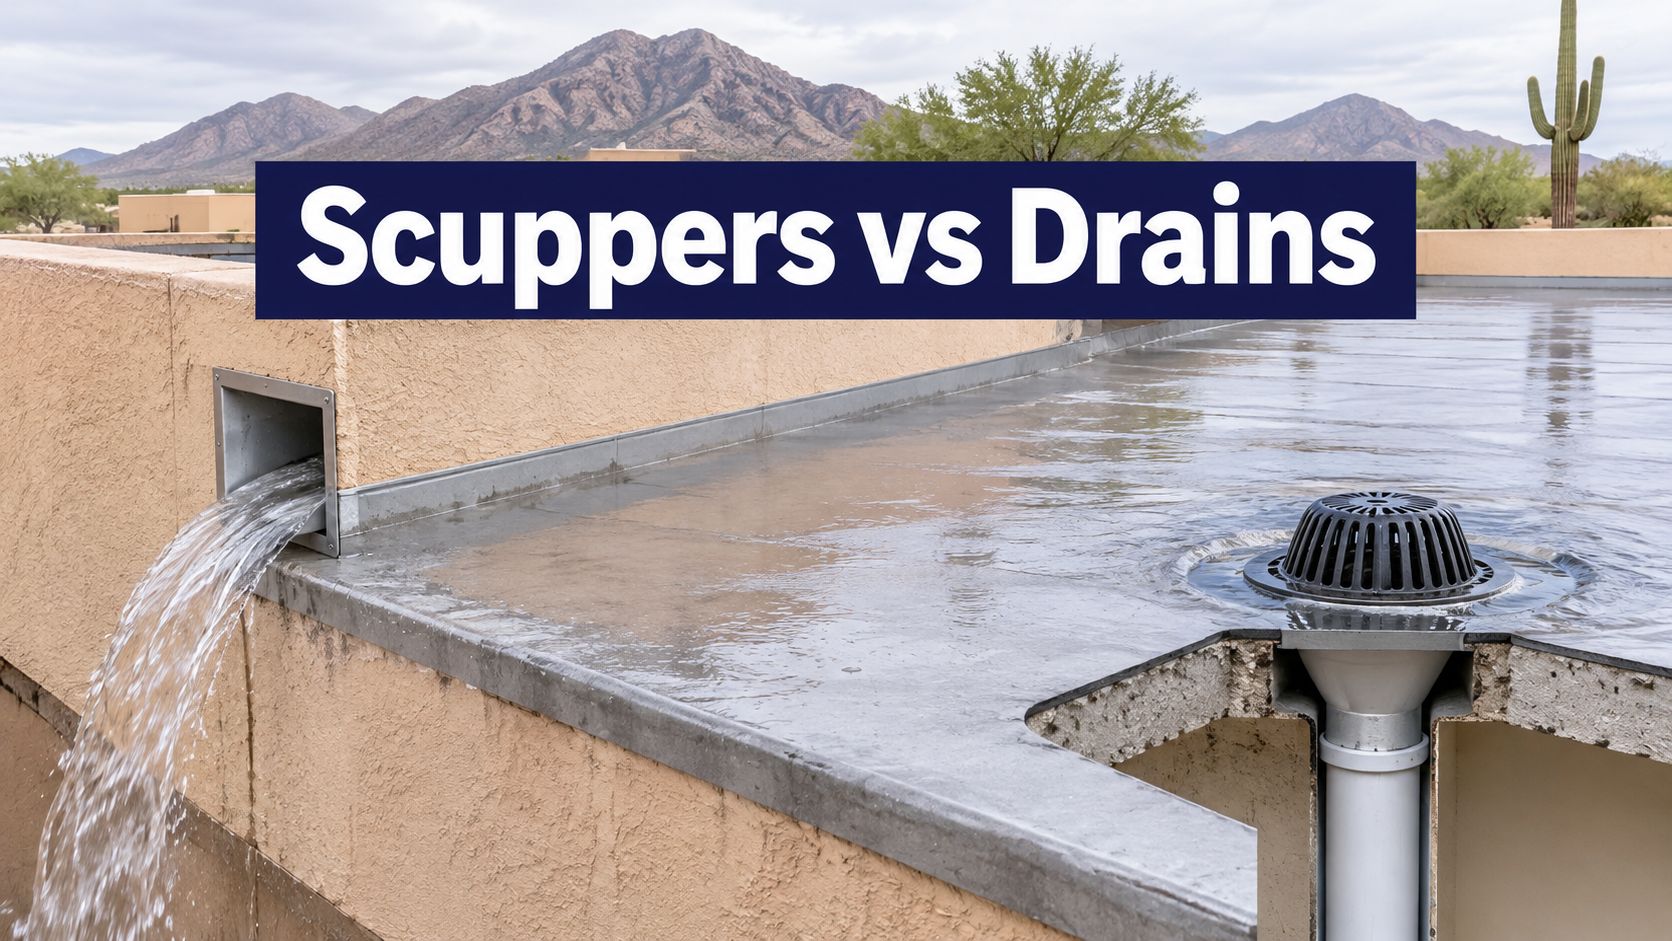
Most flat roof conversations about scuppers vs internal roof drains start in the wrong place. They get framed as a choice between two products. On a parapet-enclosed low-slope building, they usually aren't competing options at all, they're two routes in one drainage strategy, and only one of them is doing the work on a normal day. Get that straight and the rest of the decision gets much simpler.
Scuppers and Internal Drains Side by Side
Neither route is a complete answer by itself. On most low-slope commercial roofs, one opening set carries daily flow and a second, independent opening handles the day the first one plugs, and the design drawings decide which opening does which job. A scupper discharges horizontally through a parapet or roof edge, in plain sight. An internal drain collects water at a low point and sends it through a roof penetration into piping you'll never see again.
| Criterion | Scuppers | Internal drains |
|---|---|---|
| Drainage path | Horizontal discharge through a parapet or roof edge, often into a downspout or conductor head | Water collects in a drain bowl at a low point, then runs through a roof penetration, vertical leader and horizontal storm piping |
| Overflow role | Commonly used as independent secondary drainage when sized and located to code | Can serve as primary drainage or as a relief drain, but must stay independent of the primary drains |
| Maintenance access | Strainers and openings are visible from the roof edge and at the discharge point | Strainers at the roof surface are reachable; leaders and piping often need access panels or camera inspection |
| Interior piping risk | Lower, because no piping runs inside the building for the scupper itself | Higher, because concealed piping and roof-to-drain flashing can leak into the building if they fail |
| Parapet needs | Needs a parapet or edge opening sized to the design flow, with clearance from walls and entries | Often chosen where a clean parapet edge is wanted, but any parapet that can trap water still needs overflow planning |
| Design responsibility | Design professional sets opening size and elevation from roof area and local rainfall; installer follows approved drawings | Design professional sizes the primary system and piping; plumbing trade installs to the adopted code |
The physical difference is where the water goes next. A scupper dumps it outside the wall, where a tenant can watch it happen. An internal drain takes it into the building envelope, where a failed connection shows up as a stain on someone's ceiling three rooms away. America Roofing states that low-slope membranes, coatings and foams are not interchangeable and that the written roof assembly controls the system, and drainage openings are part of that assembly, not a matter of taste.
Two things still have to work regardless of which route is primary: the local design rainfall the system was sized against, and an overflow path that functions when the primary is blocked. A preference for a clean parapet, or a lower installed cost, settles neither.
Material selection for these assemblies runs wider than most owners expect, and low-slope roofing from Blue Lake Roofing Supply covers the membrane and insulation side of the same question. For the assembly view of a commercial flat roof, the drainage openings, insulation layout and membrane detailing have to agree with each other.
By the end of an inspection, an owner should be able to say two things out loud. Which opening is the primary route, and which opening is the overflow. If either answer is unclear, that's the finding.
How Scuppers and Internal Drains Move Water
Water only reaches a drain or a scupper because something upstream pushed it there. Roof slope starts the job, and on a flat deck that slope comes from tapered insulation and crickets, the angled panels built up between drains and around curbs and rooftop equipment to steer water toward a low point or an edge. Get the slope wrong and neither drainage type helps.
The diagram below traces both routes from the roof surface to the point where water leaves the building.
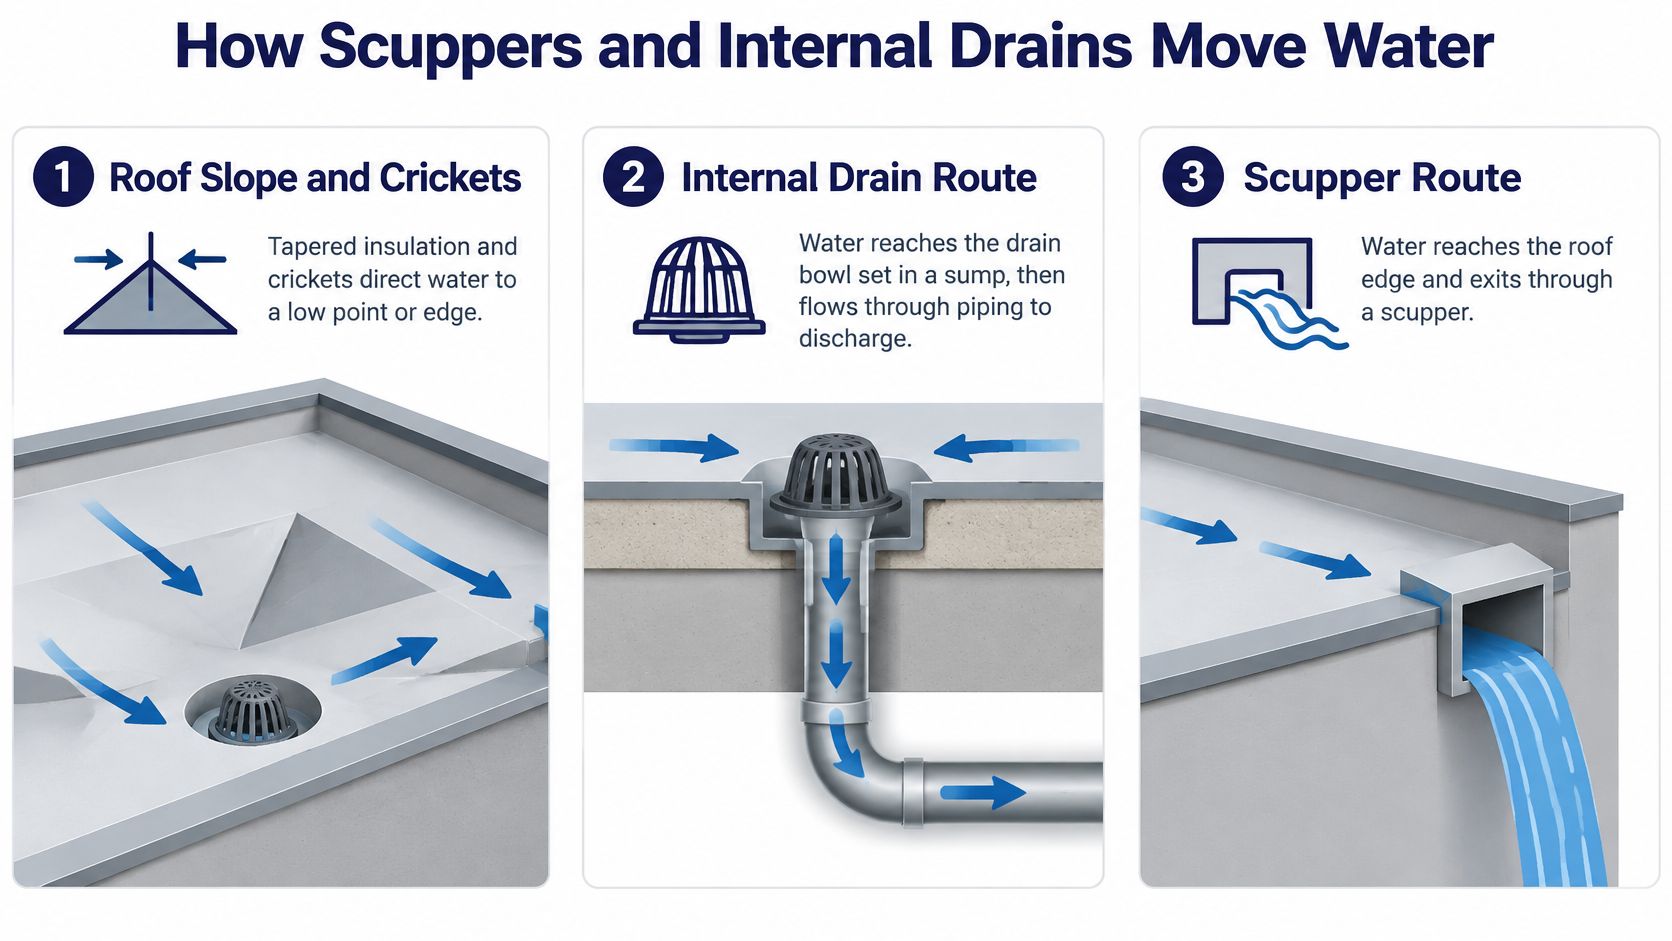
The internal drain route
- Water drains to the drain bowl set in a sump, a shallow depression that collects flow to a single point.
- It passes the strainer and clamping ring, where the membrane is sealed to the bowl flange.
- It drops through the leader, a vertical pipe inside or attached to the building.
- It runs through horizontal storm piping to the building's storm connection.
- It discharges at grade or into the storm system.
The scupper route
- Water crosses the roof to the opening in the parapet or edge.
- It passes into a conductor head or downspout mounted on the exterior wall.
- It discharges onto a splash block, gravel or graded ground clear of the wall.
Both routes leave the building at different heights and in different directions, which is why the discharge point matters as much as the inlet. On an Arizona building, a monsoon downpour coming off a scupper can land on a walkway, a stucco wall or new landscaping if nobody planned the outlet.
Pipe size isn't picked from habit. The International Plumbing Code bases storm-drain and leader sizing on the local 100-year hourly rainfall rate and the roof-drain manufacturer's published flow rate, and available head of water affects capacity. In the locally adopted edition, that makes rainfall intensity, roof slope, drainage areas and outlet elevations the drivers, not a generic pipe diameter.
The practical test: follow the water with your finger on the drawings from the highest point of the roof to where it hits the ground. Any gap in that line is where a leak will start.
Primary Drains and Overflow Roles Explained
Water doesn't need a hole in the membrane to damage a building. It only needs the primary drain to stop working behind a parapet. Once that happens, water rises against the wall, adds load across the deck, and finds whatever escape exists, either over the top of the parapet or through a weak point in the assembly.
That is why model codes don't treat scuppers and internal drains as interchangeable. Under the 2018 International Building Code, Chapter 15, a roof with parapets or other perimeter construction that could trap water must have secondary emergency drainage for when primary drains become blocked or can't carry the design flow. Secondary drainage may use overflow drains or scuppers, and a scupper has to be sized and located to hold ponding to the depth the structure was designed for. The same code sets a minimum scupper opening dimension of 4 inches (102 mm) and prohibits counting primary-drain flow when locating or sizing emergency scuppers.
Those rules give an owner measurable checkpoints to look for:
- Opening height. A minimum scupper opening dimension of 4 inches (102 mm) under the 2018 IBC.
- Width against the drain. The 2024 International Plumbing Code requires scupper openings at least as wide as the circumference of a roof drain serving the same roof area, per the International Code Council.
- Elevation and separation. One 2024 IBC implementation puts the scupper flow line no more than 2 inches above the roof's low point and requires secondary scuppers at least 4 feet horizontally from primary scuppers and primary piped roof drains, as published in the 2024 IBC as adopted in Wichita-Sedgwick.
None of that is hydraulic design. These are thresholds for inspection and reroofing planning, not a sizing method, and they don't tell you whether your building's openings are adequate.
The edition question matters more than most owners realize. The 2024 International Building Code consolidated drainage requirements through roof, structural-loading and plumbing provisions, deleting a duplicative standalone scupper section. Confirm with the local building department which edition and amendments apply before anyone adds or moves an opening.
Ask the designer one question before anything else: when the primary drain is blocked solid, where does the water go, and at what depth does it start leaving?
Blockage Risks and Where Water Shows First
Dust is the failure mode Arizona owners underestimate. It settles into strainers, sumps, scupper openings and downspouts through the dry months, and the first real monsoon rain turns that dust into a mat over the opening. Leaves and wind-blown debris finish the job.
The two systems announce a blockage differently. An internal drain shows ponding in the sump and slow drain-down, sometimes long after the rain stops. A scupper shows water sheeting over the parapet edge or pooling at an opening that should be running free.
| Failure | Where it shows first | Likely cause | First check |
|---|---|---|---|
| Internal drain strainer clogged | Ponding in the drain sump and slow drain-down after rain | Leaves, grit or dust at the strainer | Clear the strainer from the roof surface, then check drain-down time |
| Internal drain or leader blocked | Water rising in the sump, then stains or drips on the ceiling below | Debris lodged in the leader or horizontal piping | Check accessible points; leave concealed piping to a licensed plumber or roofer |
| Scupper opening blocked | Water sheeting over the edge or ponding at the scupper | Debris, gravel or flashing narrowing the opening | Look for pooling at the opening and clear the opening from the roof side |
| Downspout or discharge blocked | Water spilling from the conductor head or running down the wall | Silt or debris in the downspout or at the discharge point | Check discharge point and splash protection after each storm |
| Overflow opening set too high | Ponding deeper than the roof's design depth before water leaves | Opening set above the low point, or added flashing raised its edge | Measure from the low point and compare with the design drawings |
The emergency logic is straightforward. Codes don't allow primary drainage flow to be credited when sizing secondary scuppers, so the overflow has to work on its own. As the 2018 International Building Code provisions adopted in Washington describe it, a properly raised and unobstructed emergency scupper can reduce hydrostatic loading when an internal drain or its downstream line clogs. A scupper set too high, narrowed by new flashing or packed with debris does the opposite and lets ponding pass the assembly's limit.
There are limits to what an owner or maintenance crew should touch. Clearing a strainer or a scupper opening from the roof surface is reasonable. Clearing concealed piping, dealing with deep ponding or working anywhere near an unprotected parapet edge belongs to a qualified roofer or plumber, and nobody should be up there during an active storm. If you're chasing an active leak, this Phoenix monsoon roof leak guidance covers what a leak is doing inside the building while you wait for a crew.
For routine observation between storms, these Phoenix flat roof drainage inspection tips work alongside the system comparison here.
Interior Leak Damage and Parapet Details
The trade-off between these two systems isn't installation cost. It's detectability and maintenance access, and that shows up as a repair bill six months after the storm.
Internal drains connect to plumbing buried in walls, ceilings and service chases, and cleaning them may mean access panels. A failed seal at the drain bowl or a leaking pipe joint puts water inside the building, so the first sign is often a ceiling stain several rooms from the roof. By then the insulation above that ceiling is wet and the damage has been running for a while. The International Institute of Building Enclosure Consultants makes the point directly, concealed plumbing makes blockage or membrane failure harder to see.
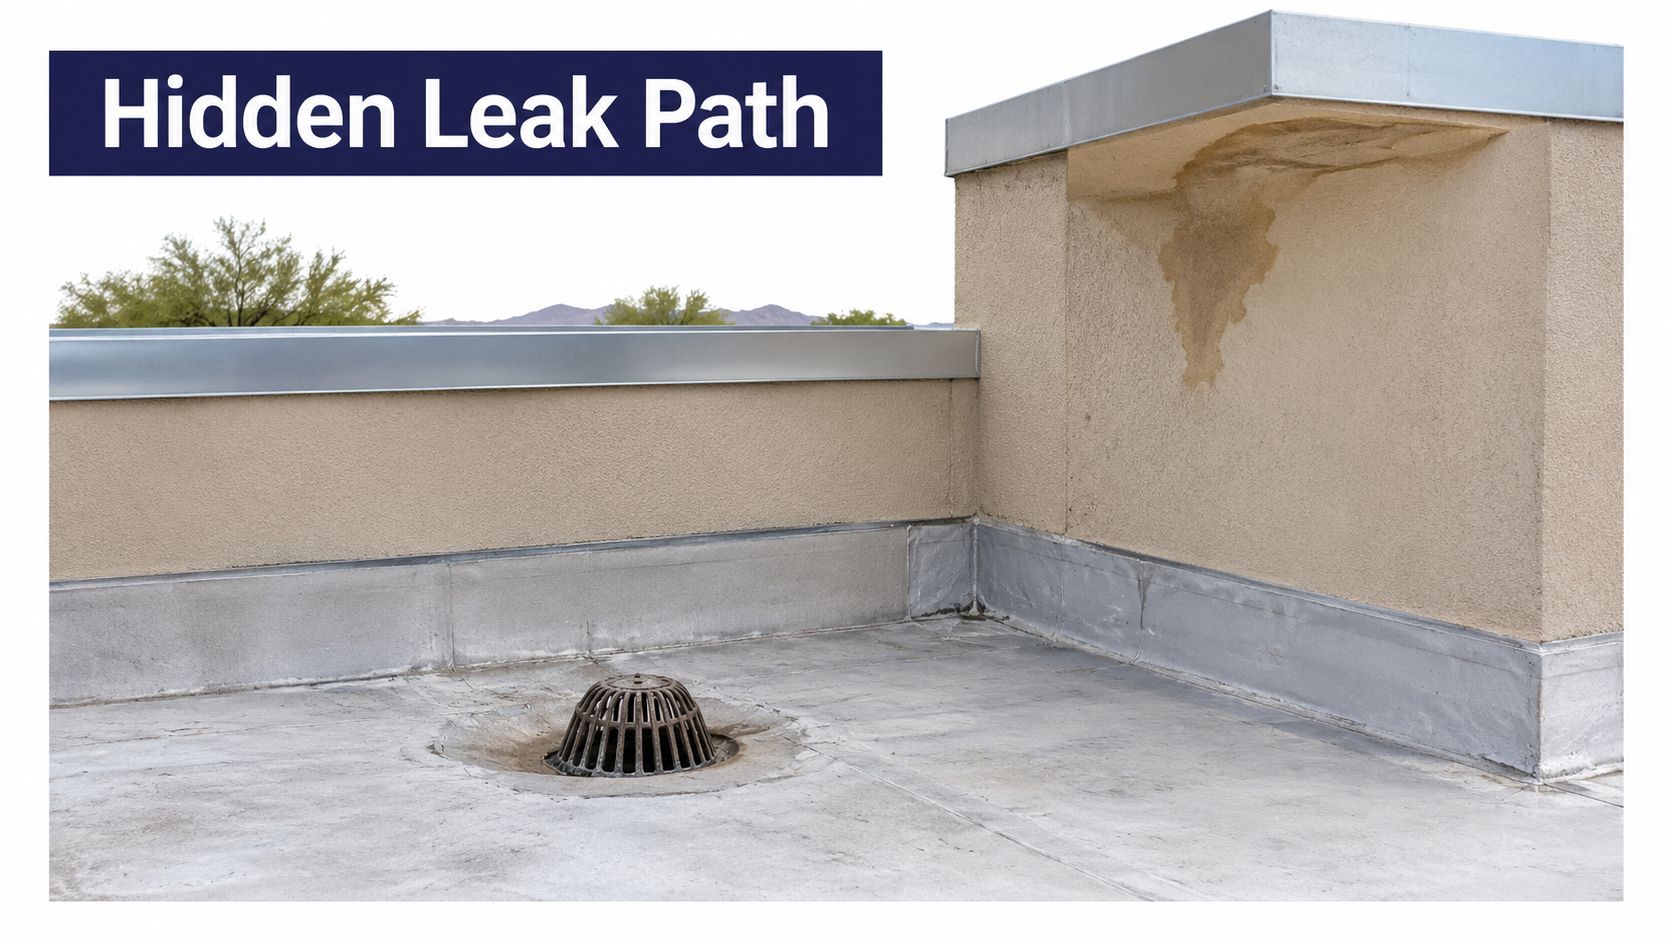
A scupper usually discharges where people can see it, through a wall or into a conductor head. Unusual flow, rust staining on a stucco wall or a permanently damp patch on a walkway gets noticed early. That visibility is an advantage, not a free pass. An opening in the wrong place soaks the wall it exits through, undermines pavement or dumps water on a lower roof.
Parapet detailing is where a lot of these problems get built in. Three items decide whether the assembly behaves:
- Parapet height against overflow elevation. The overflow opening has to sit high enough to be secondary and low enough to protect the structure.
- Parapet-to-membrane transition. That's the joint most likely to be disturbed when flashing is added later and narrows an opening.
- Conductor head size and outlet direction. The head has to take the full flow and send it away from doors, entries and walkways.
Monsoon seasons in central Arizona vary widely year to year, so plan for the wet one rather than the average. Observe ceilings and exterior walls from inside the building or from the ground and leave ceiling openings and parapet work to a roofer. An owner's job is to notice, photograph and report.
Why the Drain System Is a Design Decision
Preference doesn't decide this, inputs do. A qualified designer works from the roof area each drain or opening serves, the design rainfall intensity for the location, roof slope, the drainage layout created by crickets and tapered insulation, parapet height, the ponding depth the structure was designed to carry, and what sits below and around the roof, including walkways, entries and rooftop equipment. Change one input and the layout can change with it.
Sump geometry is a good example of how specific this gets. NRCA guidance treats a drain sump as an intentional depression that directs water to the opening and recommends sumps at internal drain locations, with a suggested width of at least the drain-bowl diameter plus 24 inches to leave room for flashing. A 12-inch drain bowl calls for a sump no smaller than 36 by 36 inches. Where primary and overflow drains share a sump, the NRCA roofing guidelines suggest 12 to 18 inches of edge-to-edge spacing so each drain can be flashed properly.
Those dimensions matter most during commercial reroofing, tapered-insulation work or a repair to a ponding area, which is exactly when a late change does the most damage. Switching the drain route after the scope is set changes insulation layout, membrane detailing and the drawings themselves, and somebody has to confirm the change is sound before material is ordered. For an owner comparing assembly options, the place to start is compare commercial flat roofing options before the design is locked.
Draw the boundary early. Nothing in a walkthrough sizes a drain, certifies code compliance or authorizes a change to an overflow path. Those decisions need a qualified design review against the locally adopted code.
America Roofing adjusts the inspection, scope and jobsite plan to the building and the roof system, which is the only sensible way to handle a rooftop where a membrane, a parapet and a plumbing stack all meet.
Monsoon Readiness Checklist and Records to Keep
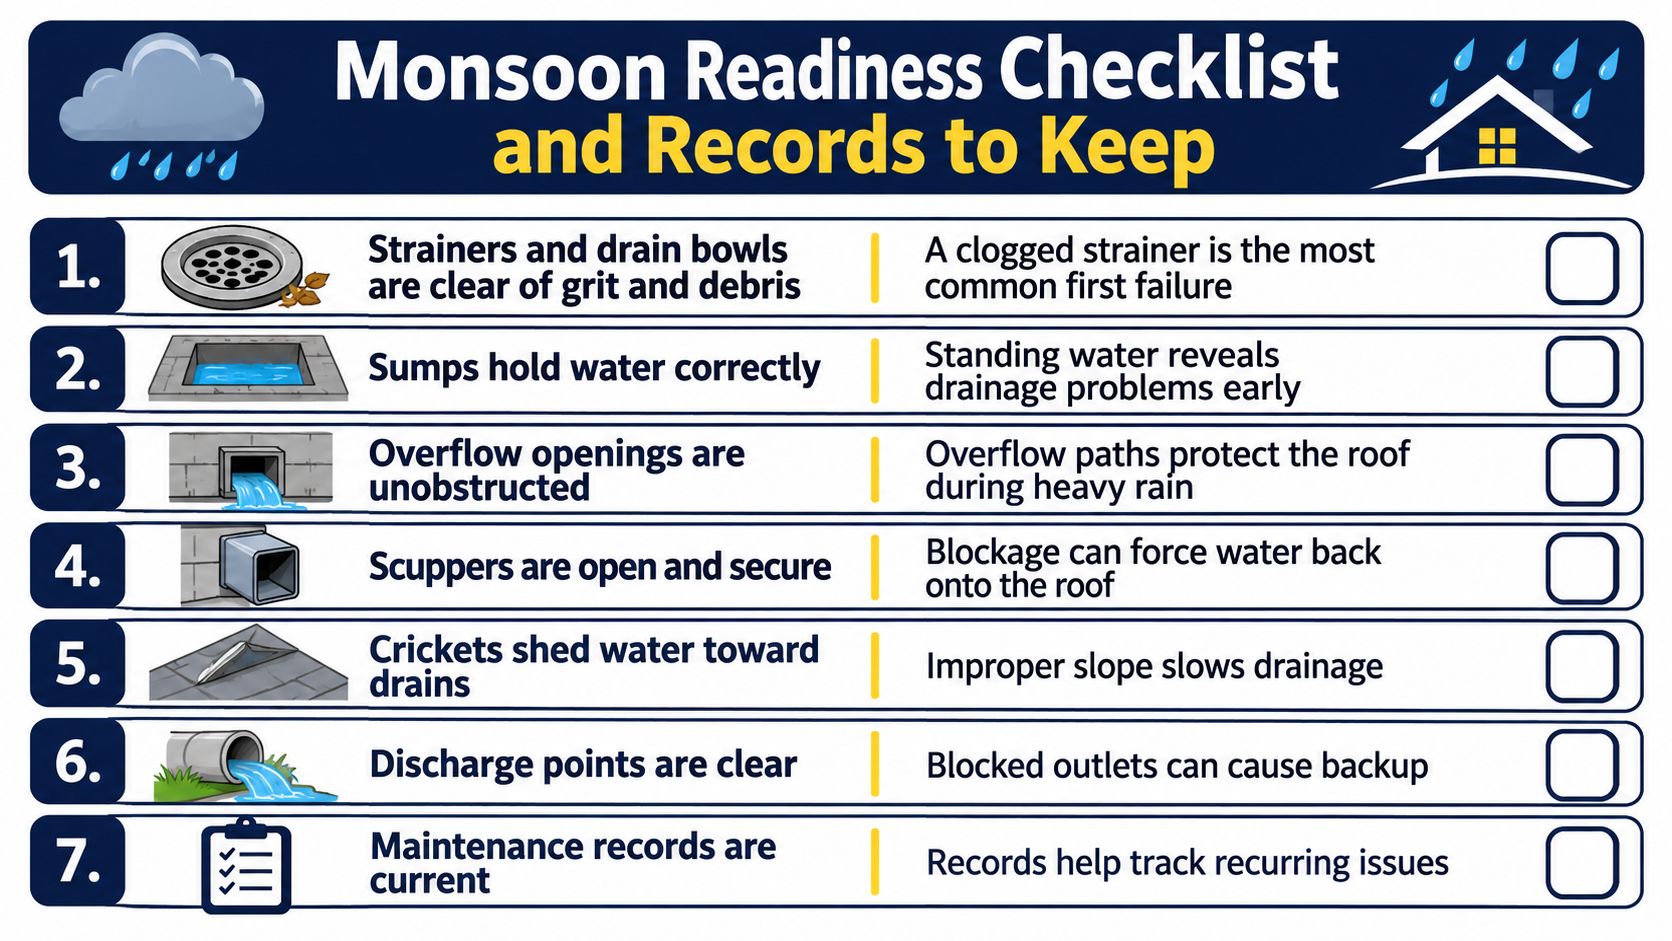
Run this list before storm season and again after the first heavy rain, because the first storm finds the debris the dry months left behind.
- Strainers and drain bowls clear of grit and debris. A clogged strainer is the most common first failure.
- Sumps free of standing water and silt. Silt builds up until the sump becomes a pond.
- Scupper openings clear and unobstructed, so the overflow works the one time you need it.
- Overflow openings at the specified height, not raised by flashing added during an unrelated repair.
- Crickets and tapered insulation still draining toward the drains, with no new low spots from settled insulation or added equipment.
- Discharge points moving water away from walls, entries, walkways and lower roofs.
- Access panels, cleaning points or camera access usable, not painted shut or buried behind a tenant's shelving.
- Drawings on hand showing where the primary and overflow openings are.
Records are what turn this from a chore into a maintenance plan. Keep the dates of inspections and cleanings, photos of openings and discharge points taken from safe positions, what debris was found, repairs made, and any change to flashing or parapet height. When a reroof happens, add the as-built overflow elevation relative to the low point, sump dimensions, discharge-point locations and drawings showing both routes.
Check from the roof edge only where a guardrail or safe access exists, and stay off the roof during active storms and extreme heat. Roof warranty terms often depend on documented maintenance, so these warranty guidance for Phoenix property managers are worth reading alongside the checklist. An America Roofing roof inspection can cover roof surfaces, flashings, penetrations, valleys, walls, drainage, prior repairs and relevant interior symptoms in one visit.
Confirm the Drain Design Before You Reroof
Three points carry the whole decision. Neither scuppers nor internal drains is a complete answer alone, the primary route and the overflow route both have to be identified and verified, and the choice follows roof inputs rather than preference.
Before a reroof or a major repair, put the questions to a qualified design professional and the local building official. Where does water go when the primary drain blocks? What is the overflow elevation relative to the low point? What do the parapet and conductor head details look like, and who is responsible for sizing them? Commercial roof systems cover planning, installation and maintenance, and the drainage decision belongs in the first of those, not the last. If the project is heading toward replacement, review commercial roof replacement planning early enough that drainage can still be changed on paper.
For a commercial flat roof in Phoenix or Tucson, start with the Arizona flat roof options, then request a roofing estimate or call 602-237-2478 to get the drainage review scheduled.
America Roofing works on commercial flat and low-slope roofs across Phoenix and Tucson, from drain and scupper details to full membrane replacement, and can walk your roof to identify the primary route, the overflow route and where water is going. Bring the questions above to the inspection and you'll get answers tied to your building rather than a generic recommendation. Visit America Roofing to set up a commercial roof inspection before the next storm season.